
When the pandemic started I ran into the problem that active dry yeast could no longer be found in any stores. So, I got on the sourdough train along with everyone else. At first I tried to make my own starter, but that wasn’t a big success. Luckily, a good friend got a starter from a local bakery, and kindly gifted some to me. Then the fun began! I started experimenting with lots of recipes for sourdough bread. Eventually, I settled on one my whole family enjoyed and I continue to make one loaf a week. The starter even moved with us from California to Pennsylvania and is still going strong.
I recorded my first instruction video to accompany this recipe because some parts are hard to explain in words. I really hope this helps. The recipe is easy and delicious but takes a lot of time and patient. Believe me, it is worth it!
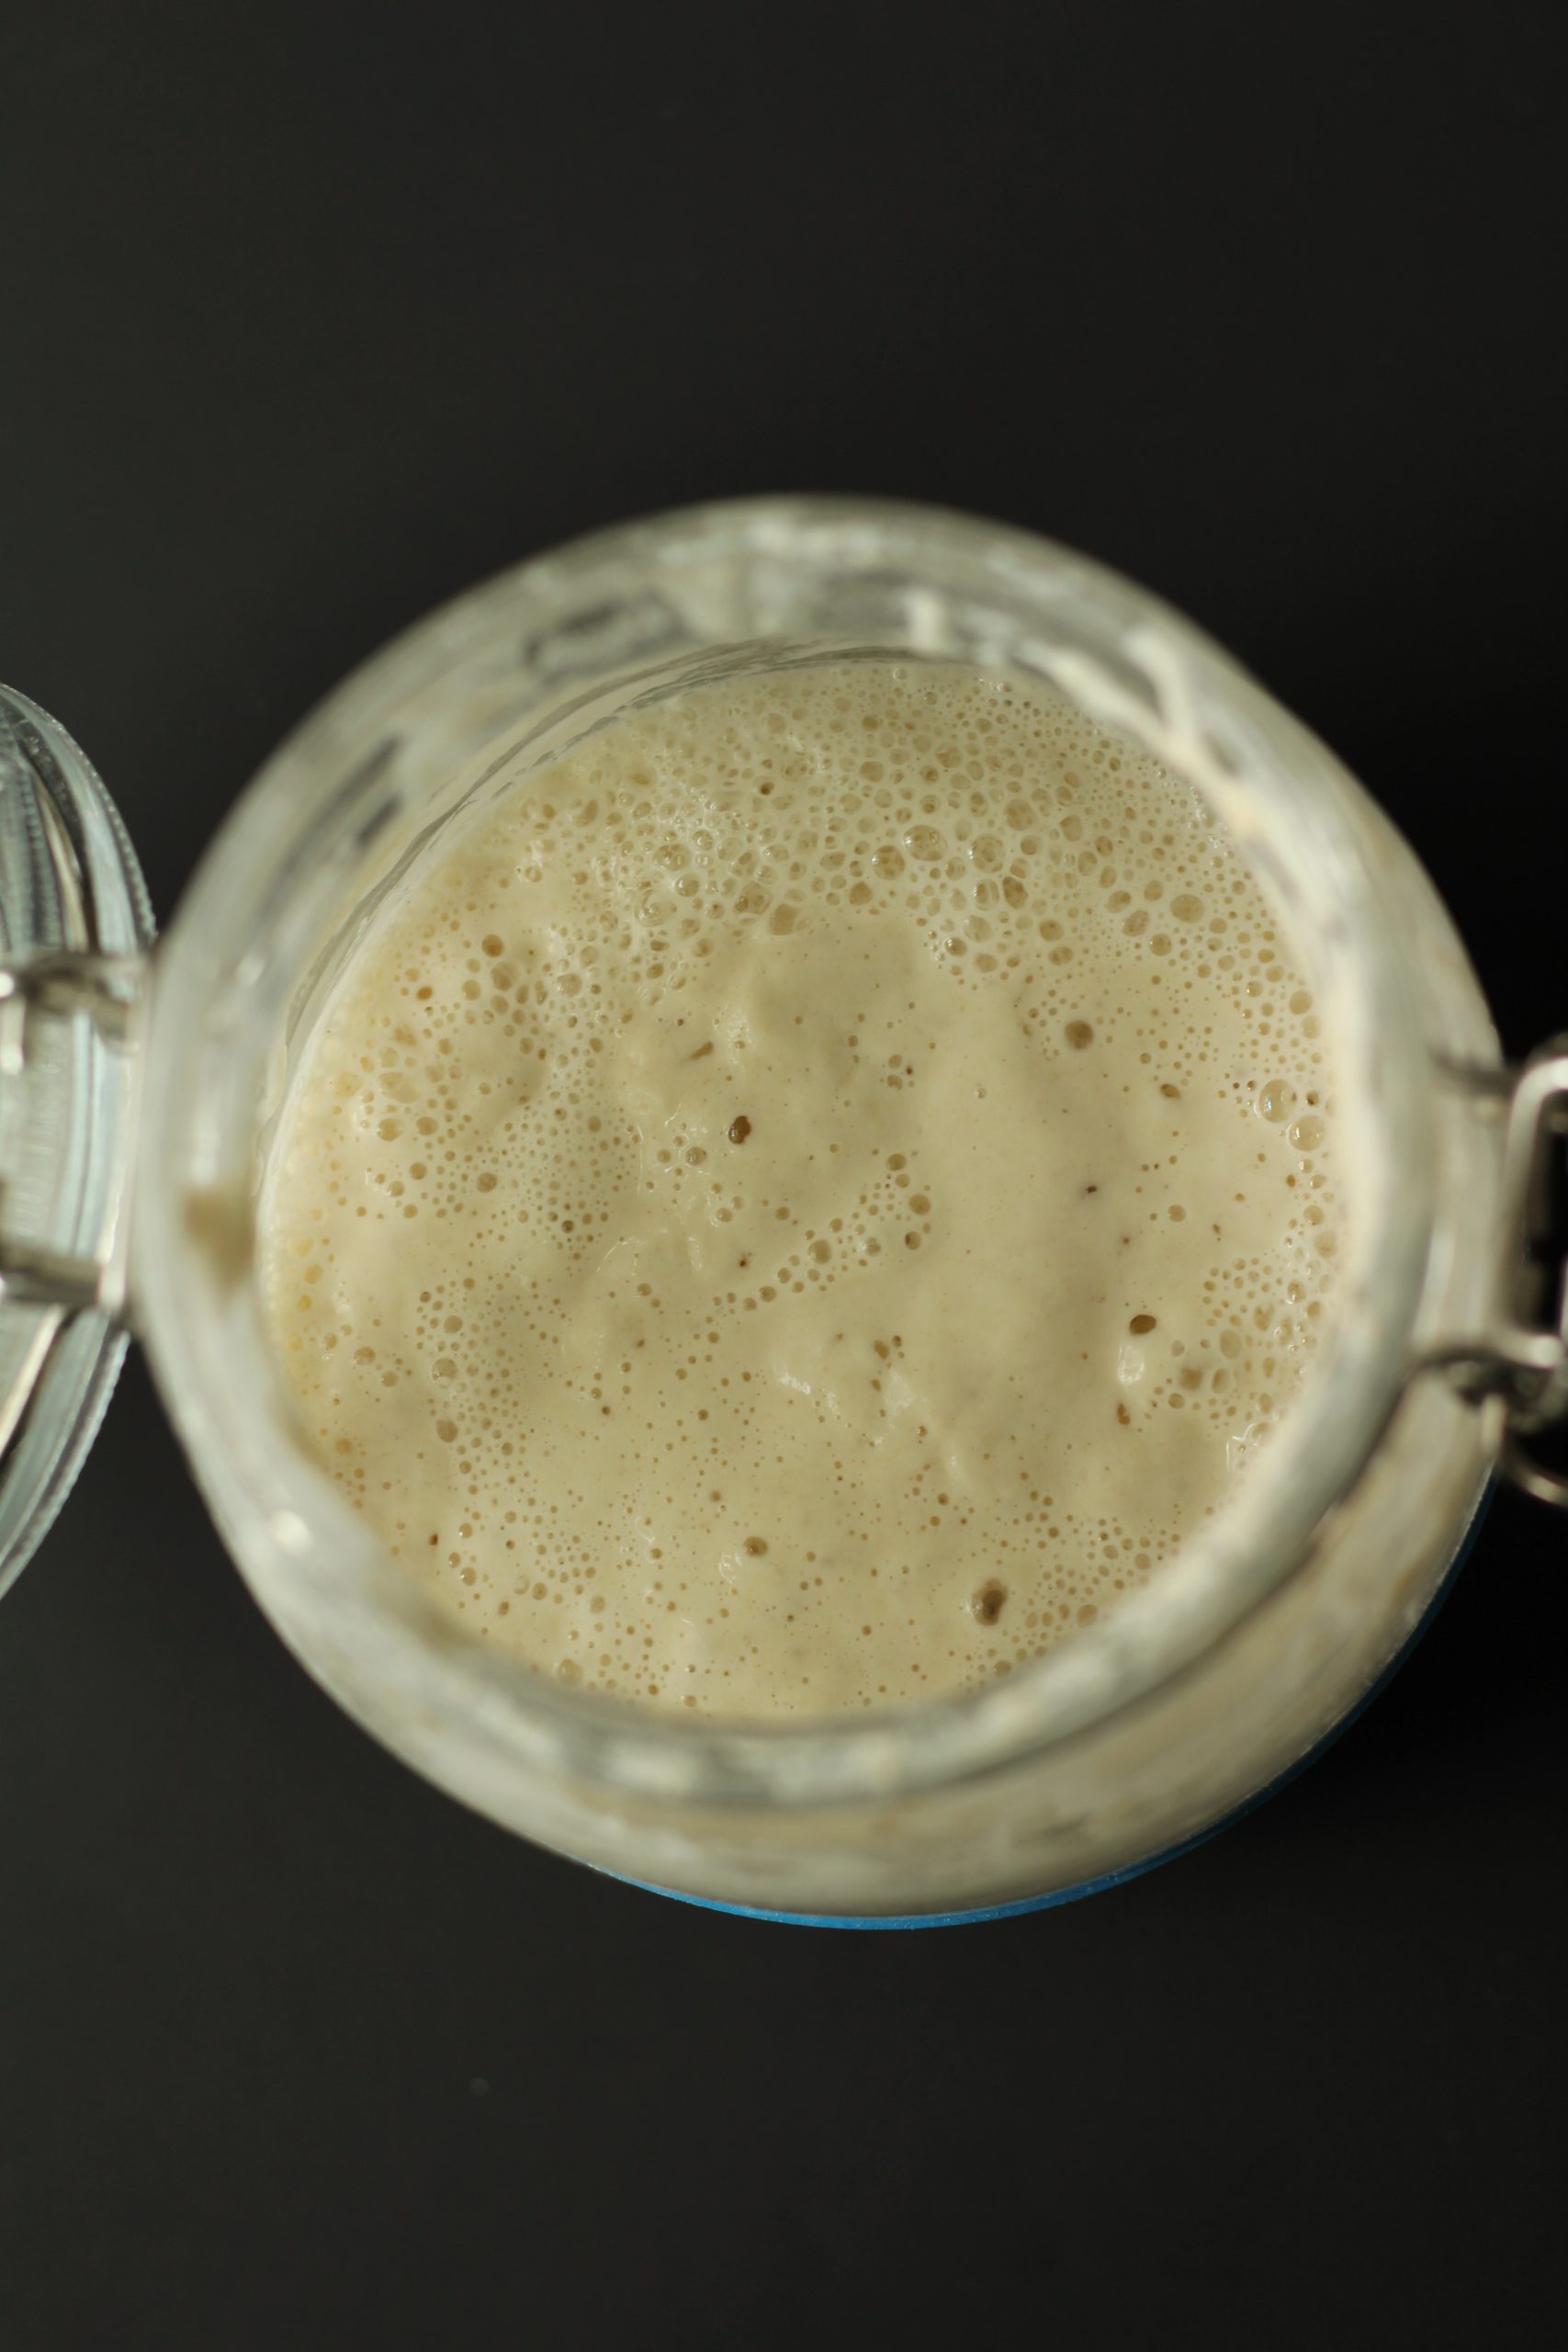
In this picture you see that my sour dough starter is active. You can tell it is active because of the air bubbles. To get an active starter, I recommend feeding your starter and letting it sit out at room temperature every 4-6 hours, or until it increases in volume by about 30%. I keep an elastic band around my jar, to help me keep track of the growth. I highly recommend to using filtered water when feeding your starter as chlorine can inhibit your active yeast. When mixing the sour dough starter do not use any metal. It is preferable to use a plastic or wood spatula throughout the making of this recipe.
I normally let my dough rest overnight on the counter top because it takes a long time. Keep this in mind when you feed your sour dough starter. For example, if you feed the starter around 12 pm it will be active around 6 pm. This will allow you to let it rise overnight on your counter and bake the bread the next morning.
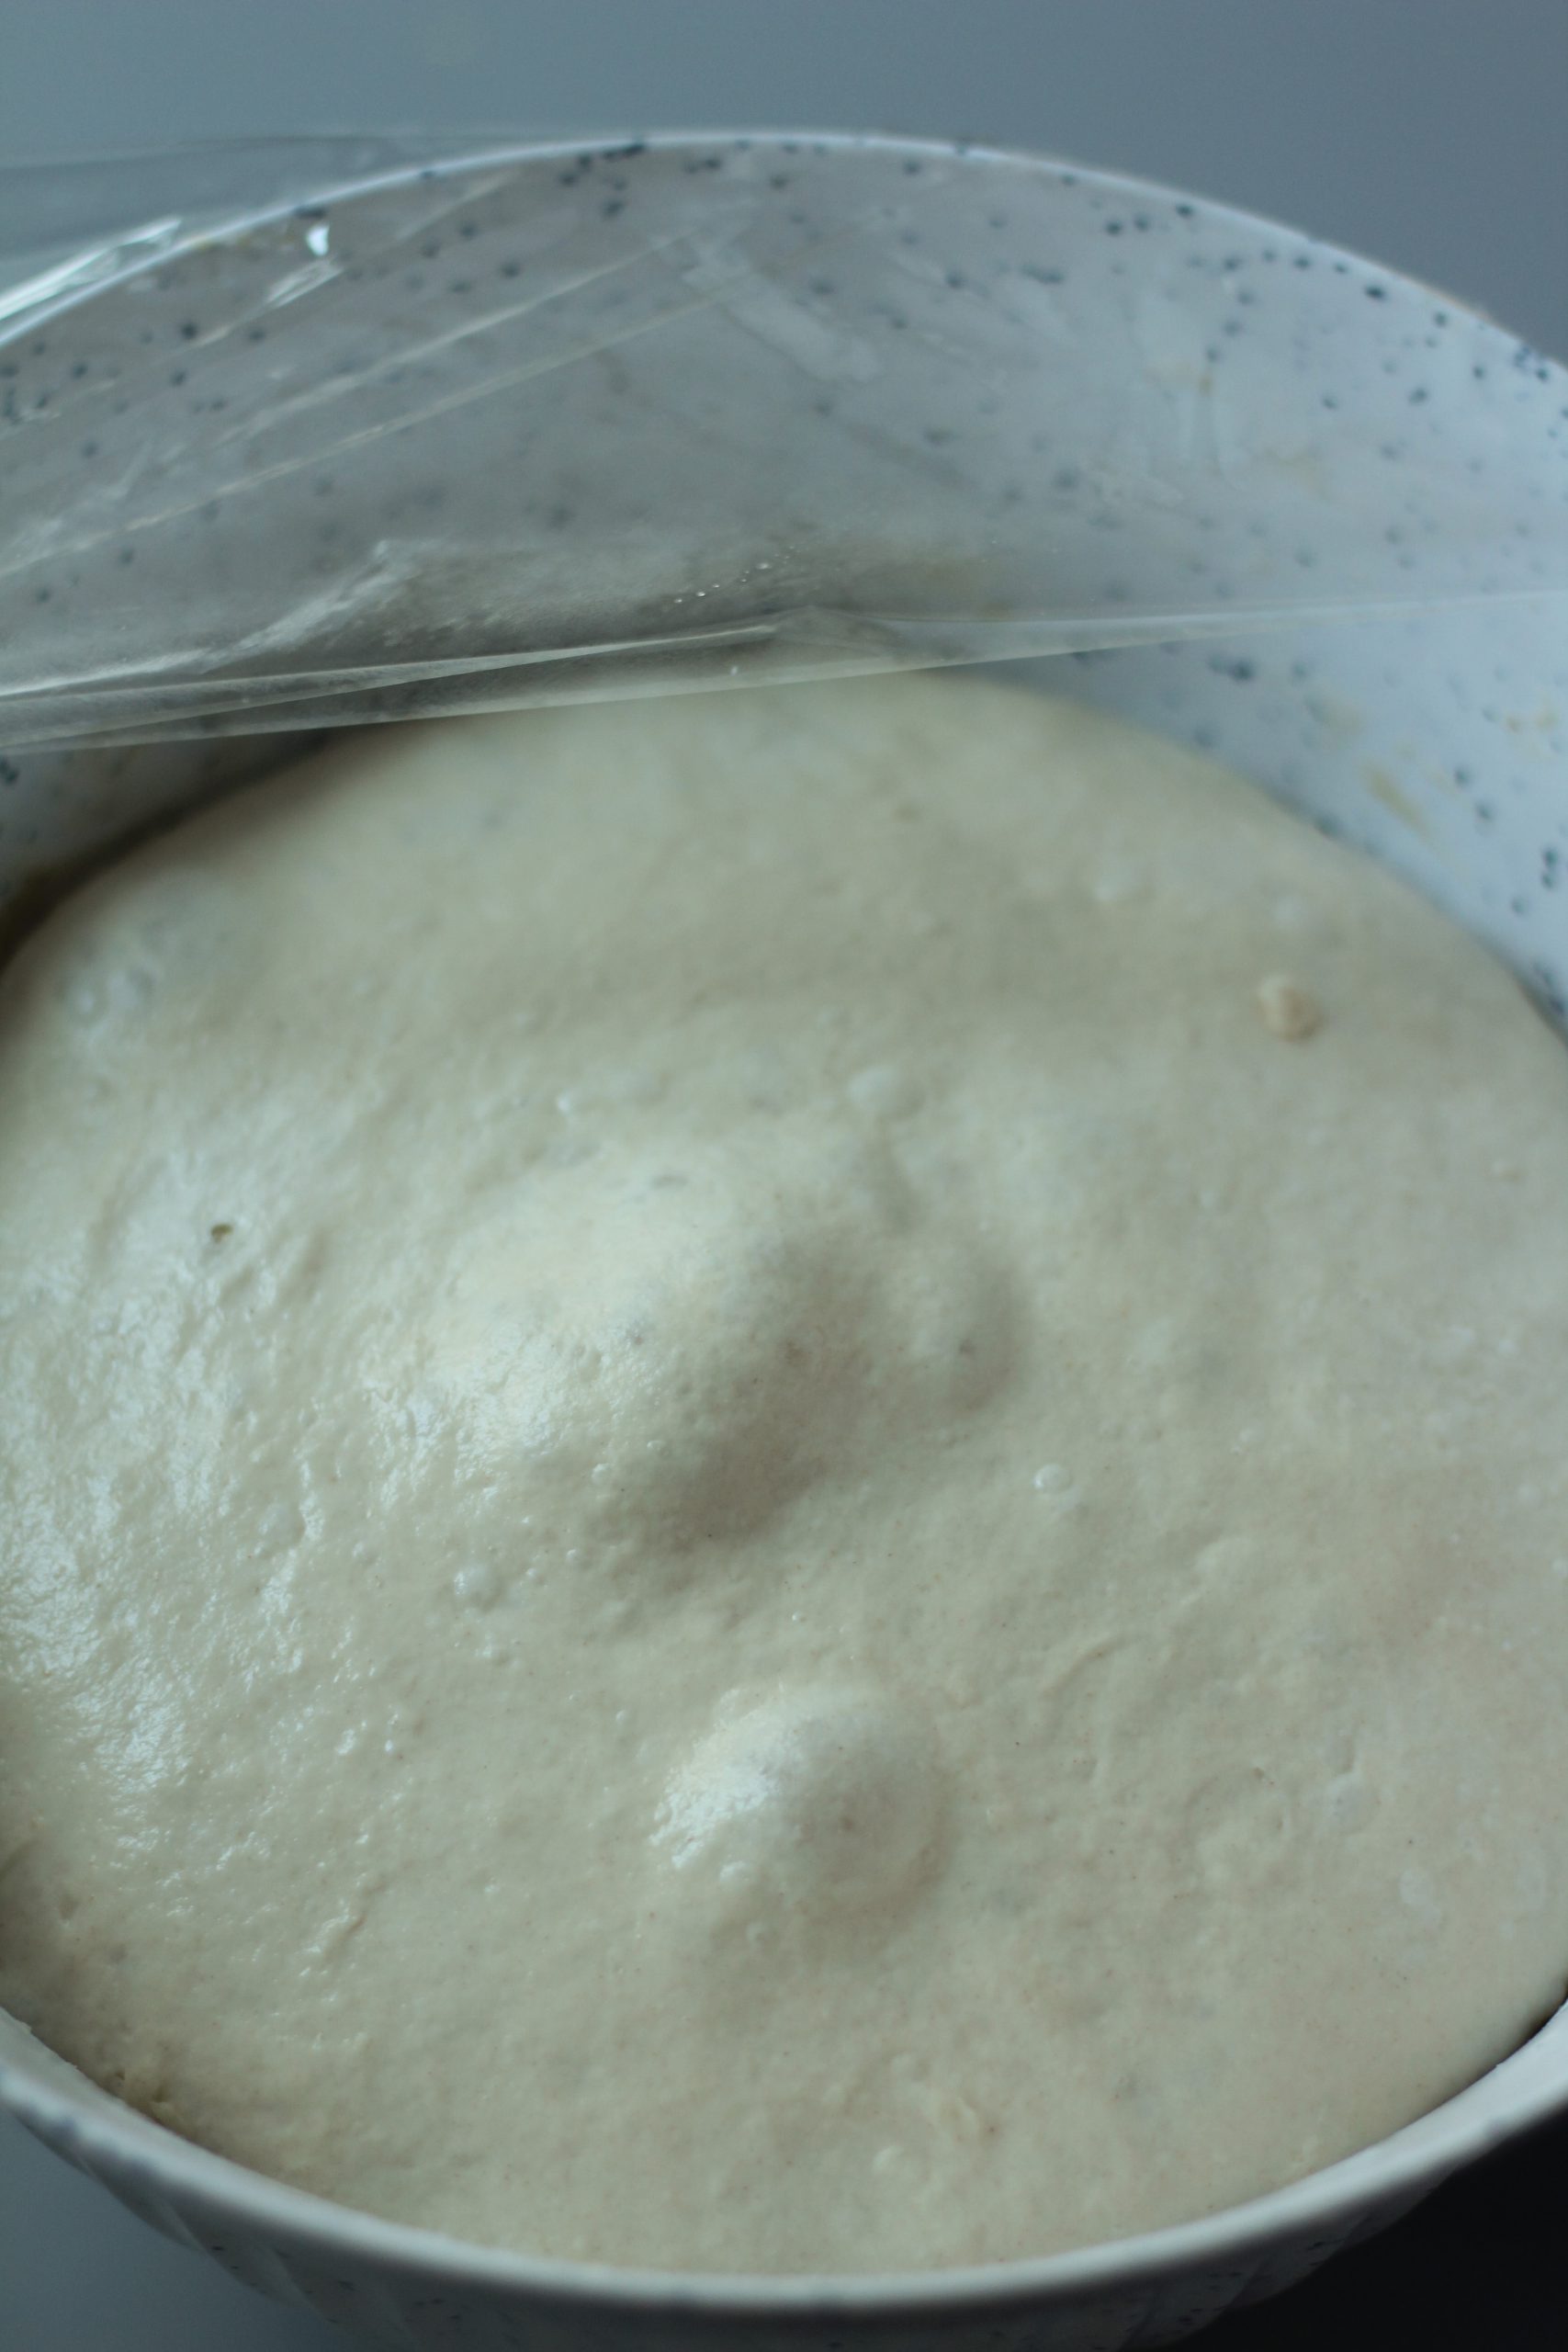
Air bubbles should form after the 8-12 hour rise. The exact time needed varies based on the climate where you live. In the winter it may take 12 hours versus on a hot summer night it can take 6-8 hours. In order to keep those air bubbles inside the dough, carefully scrape the dough out of the bowl with a flexible plastic scraper. Try to keep the air in as much as possible. This will create those beautiful holes in the bread later.
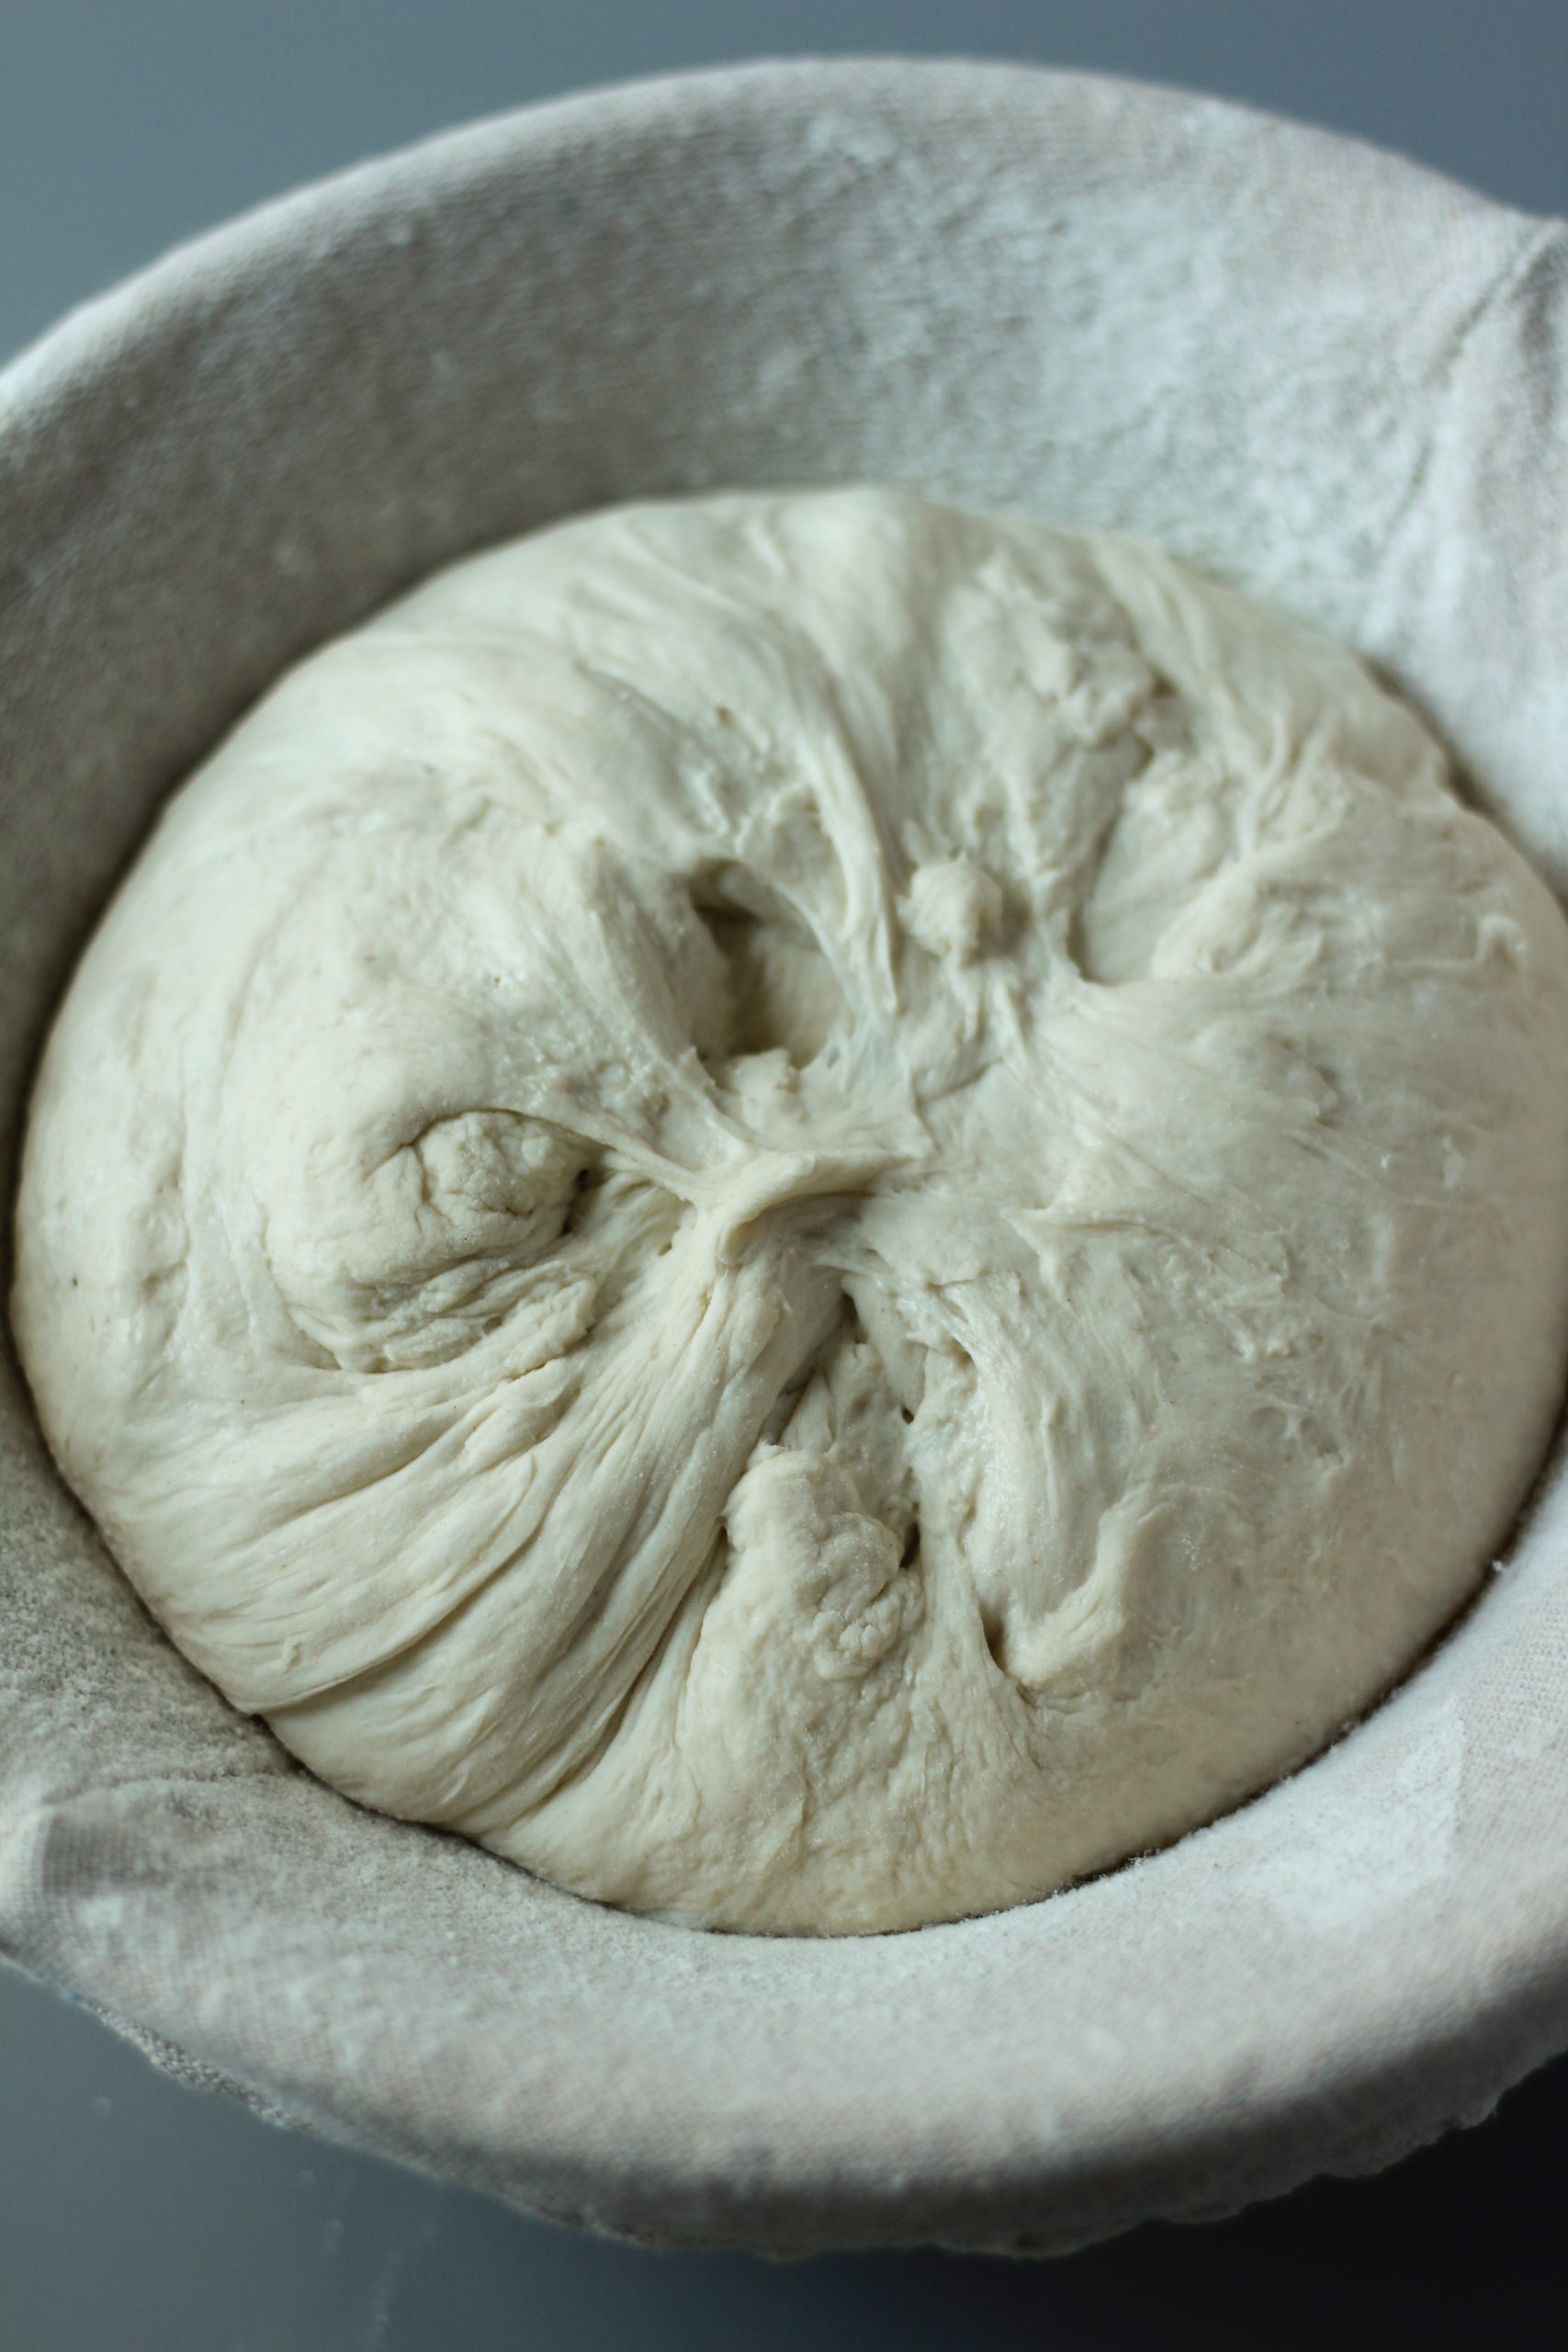
Placing the dough into a floured proving basket will allow it to rise nicely. These come in different shapes and sizes.
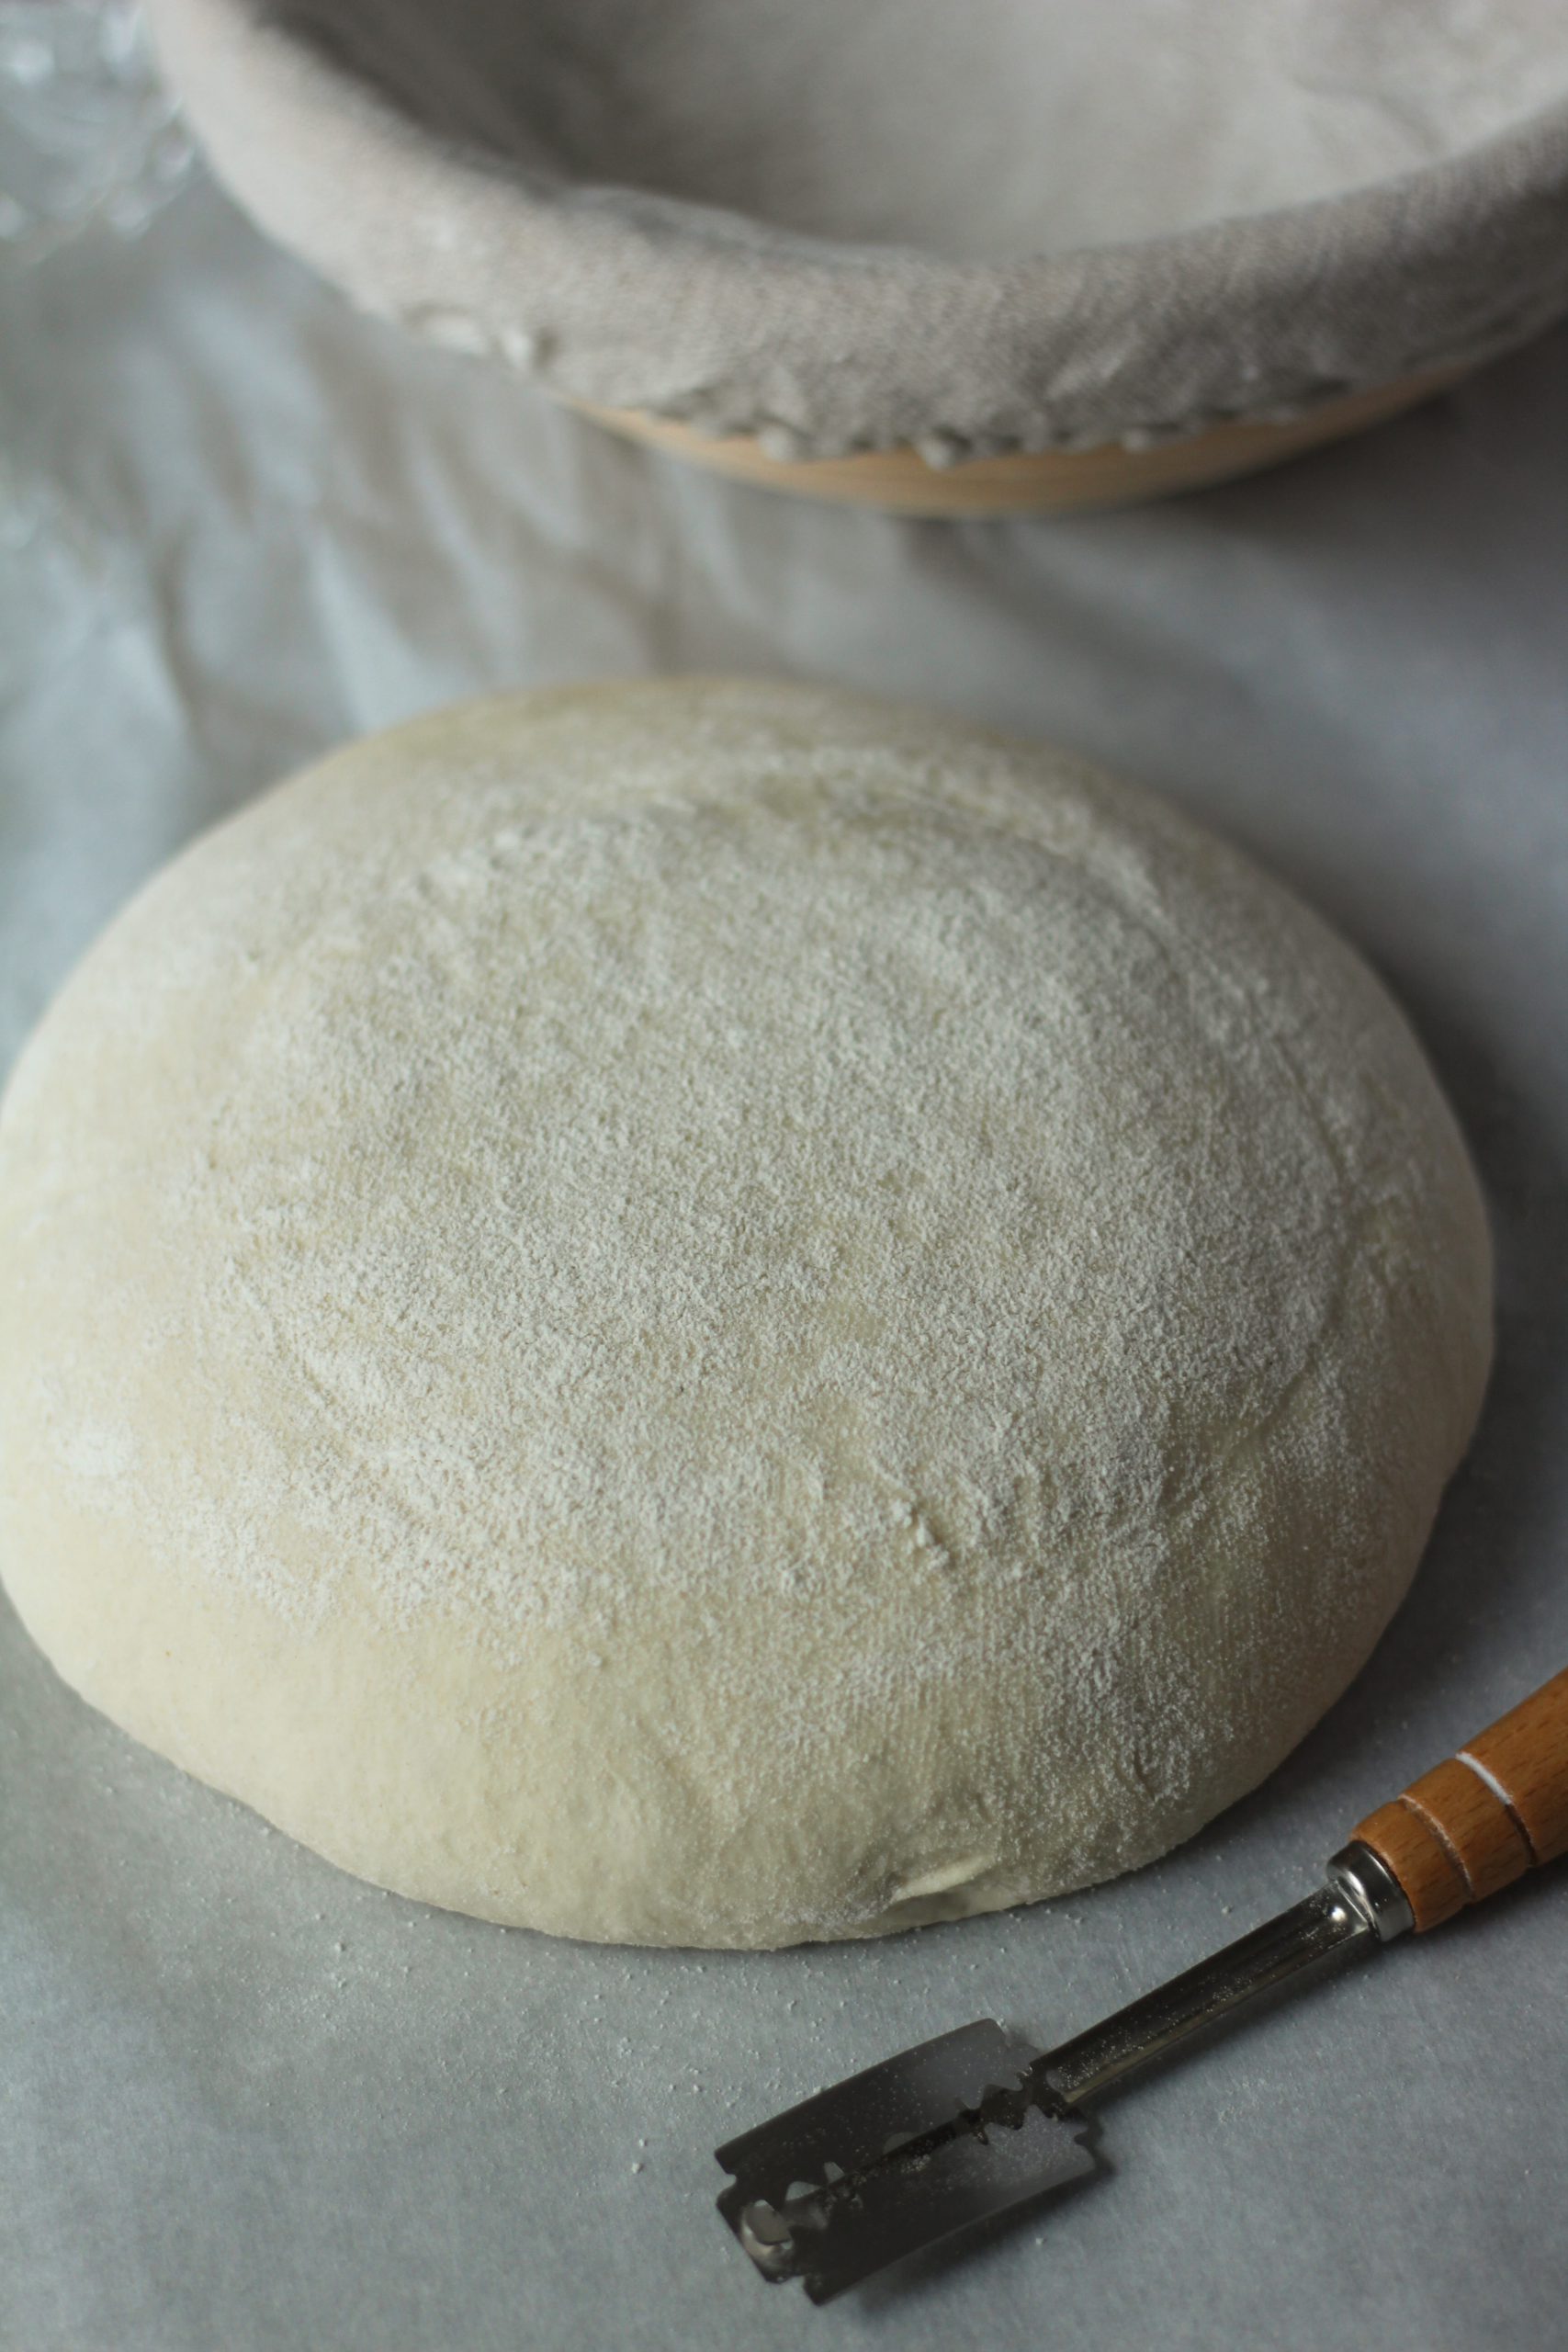
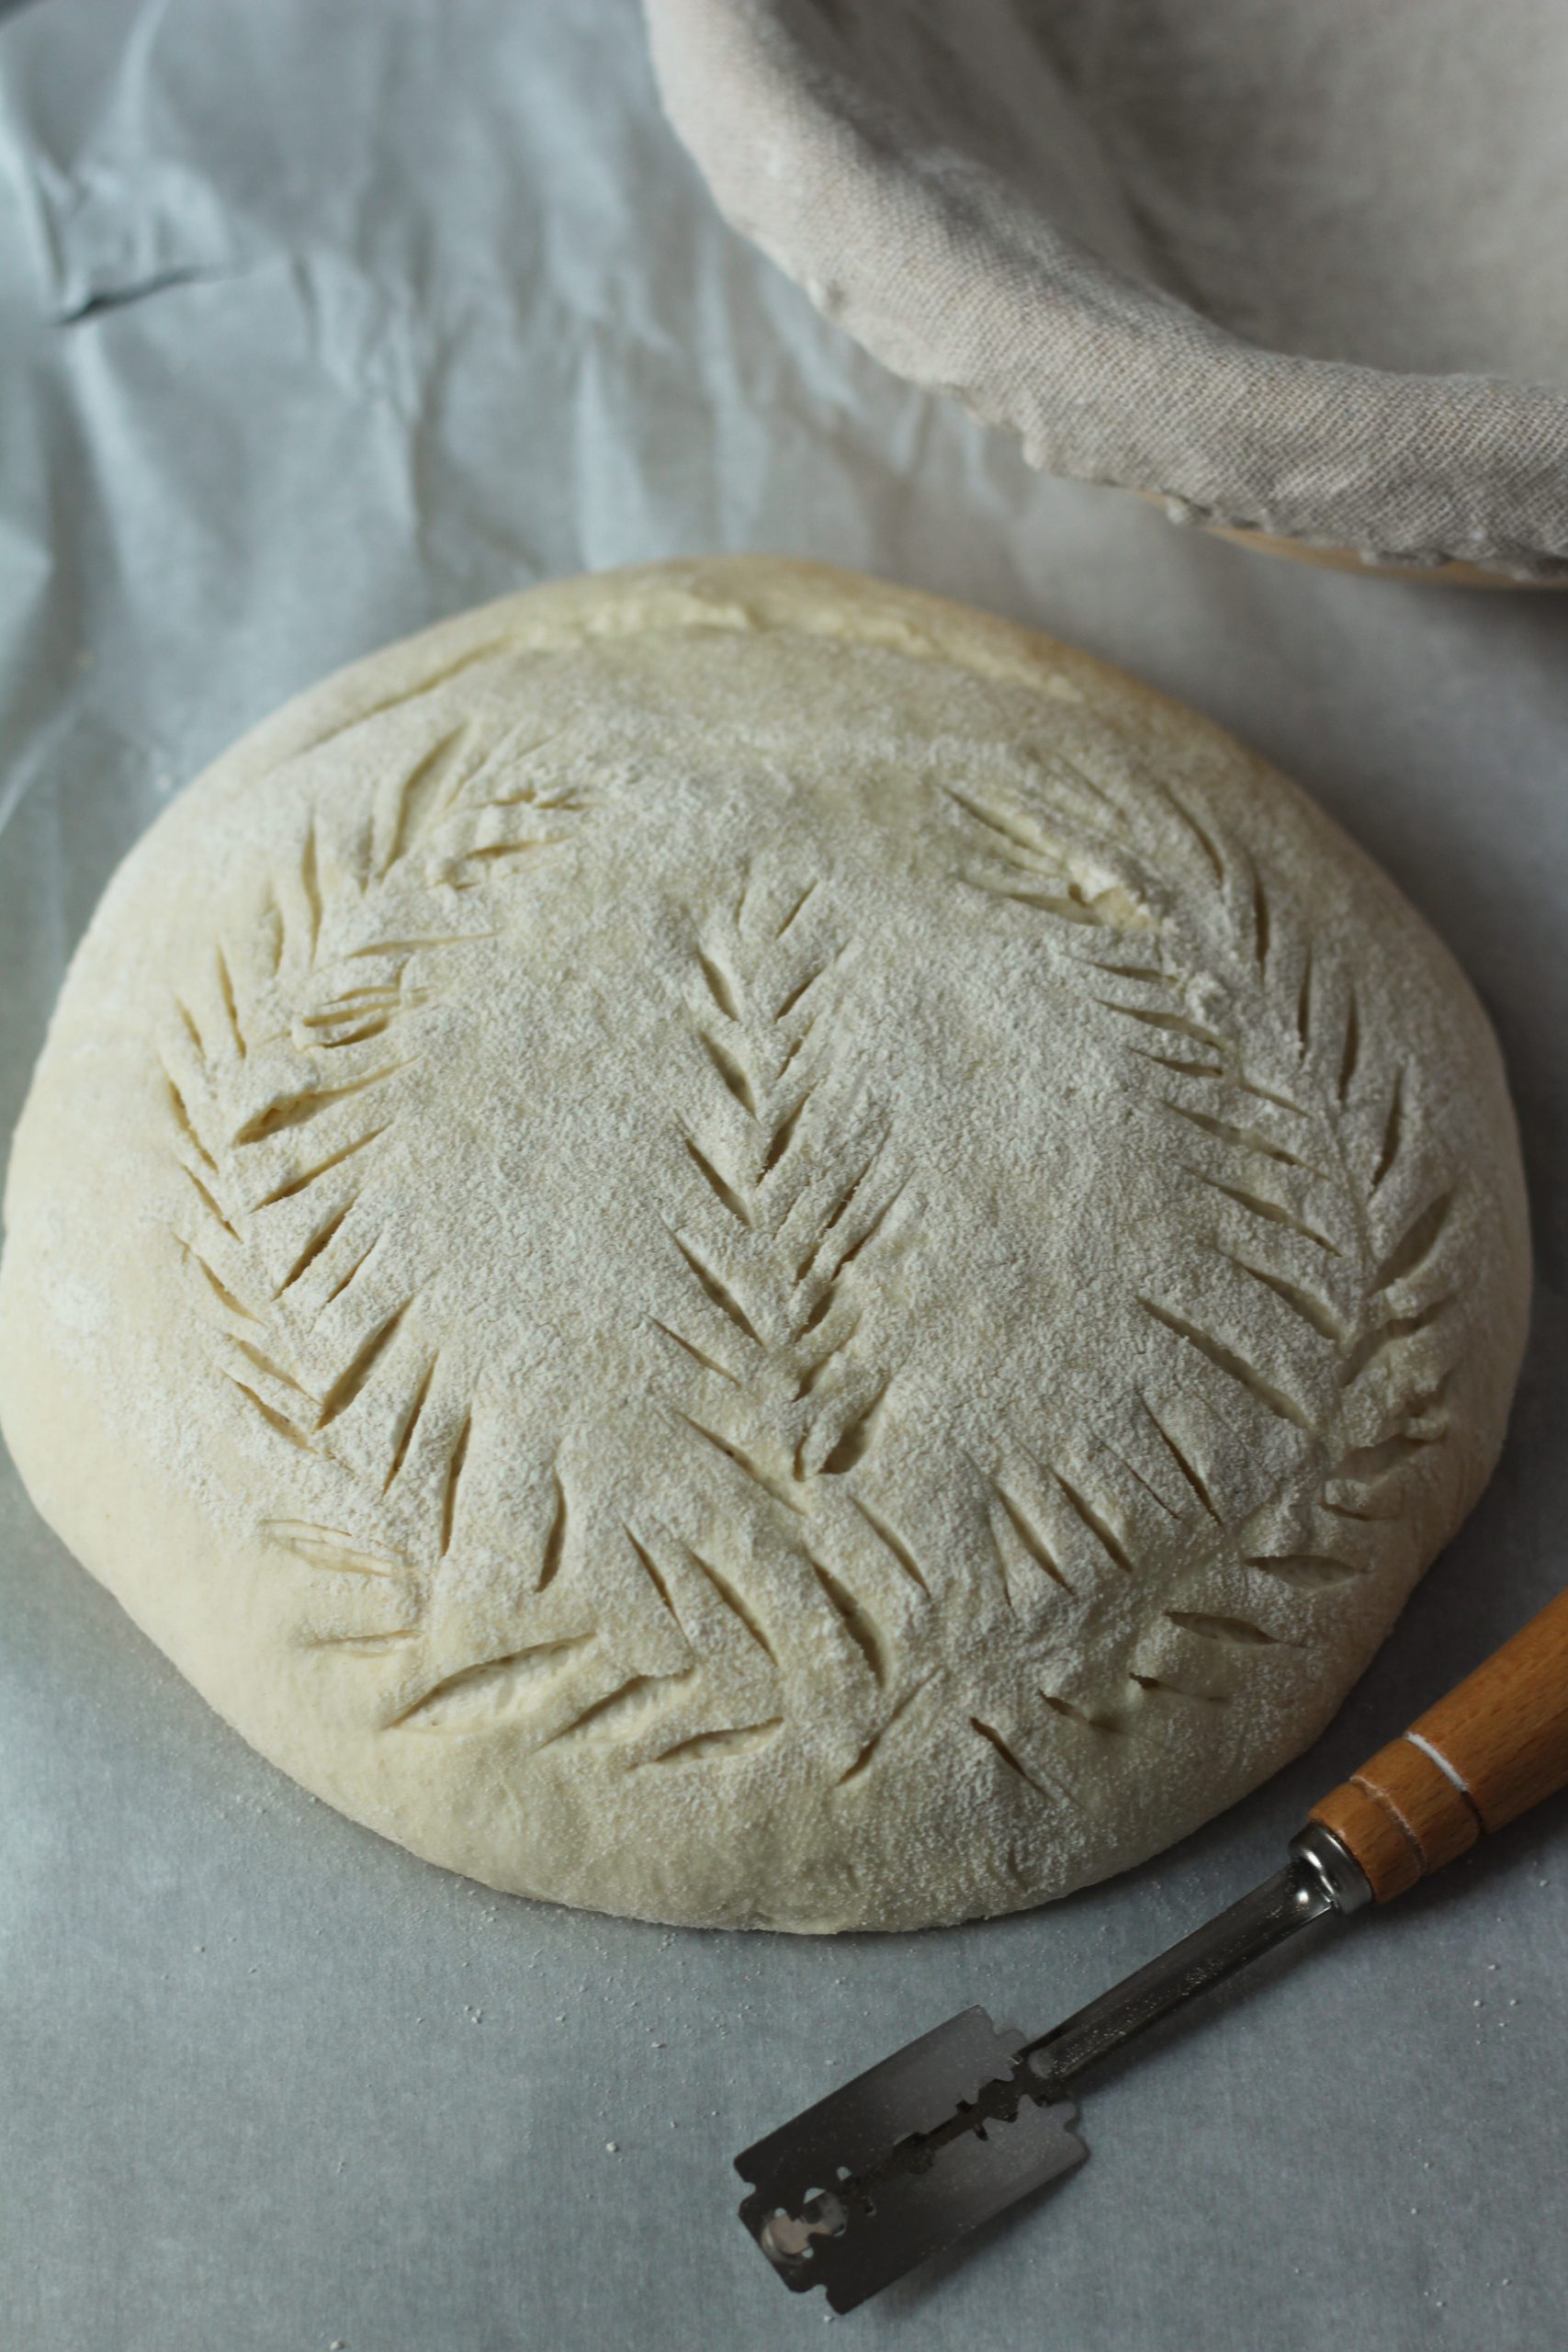
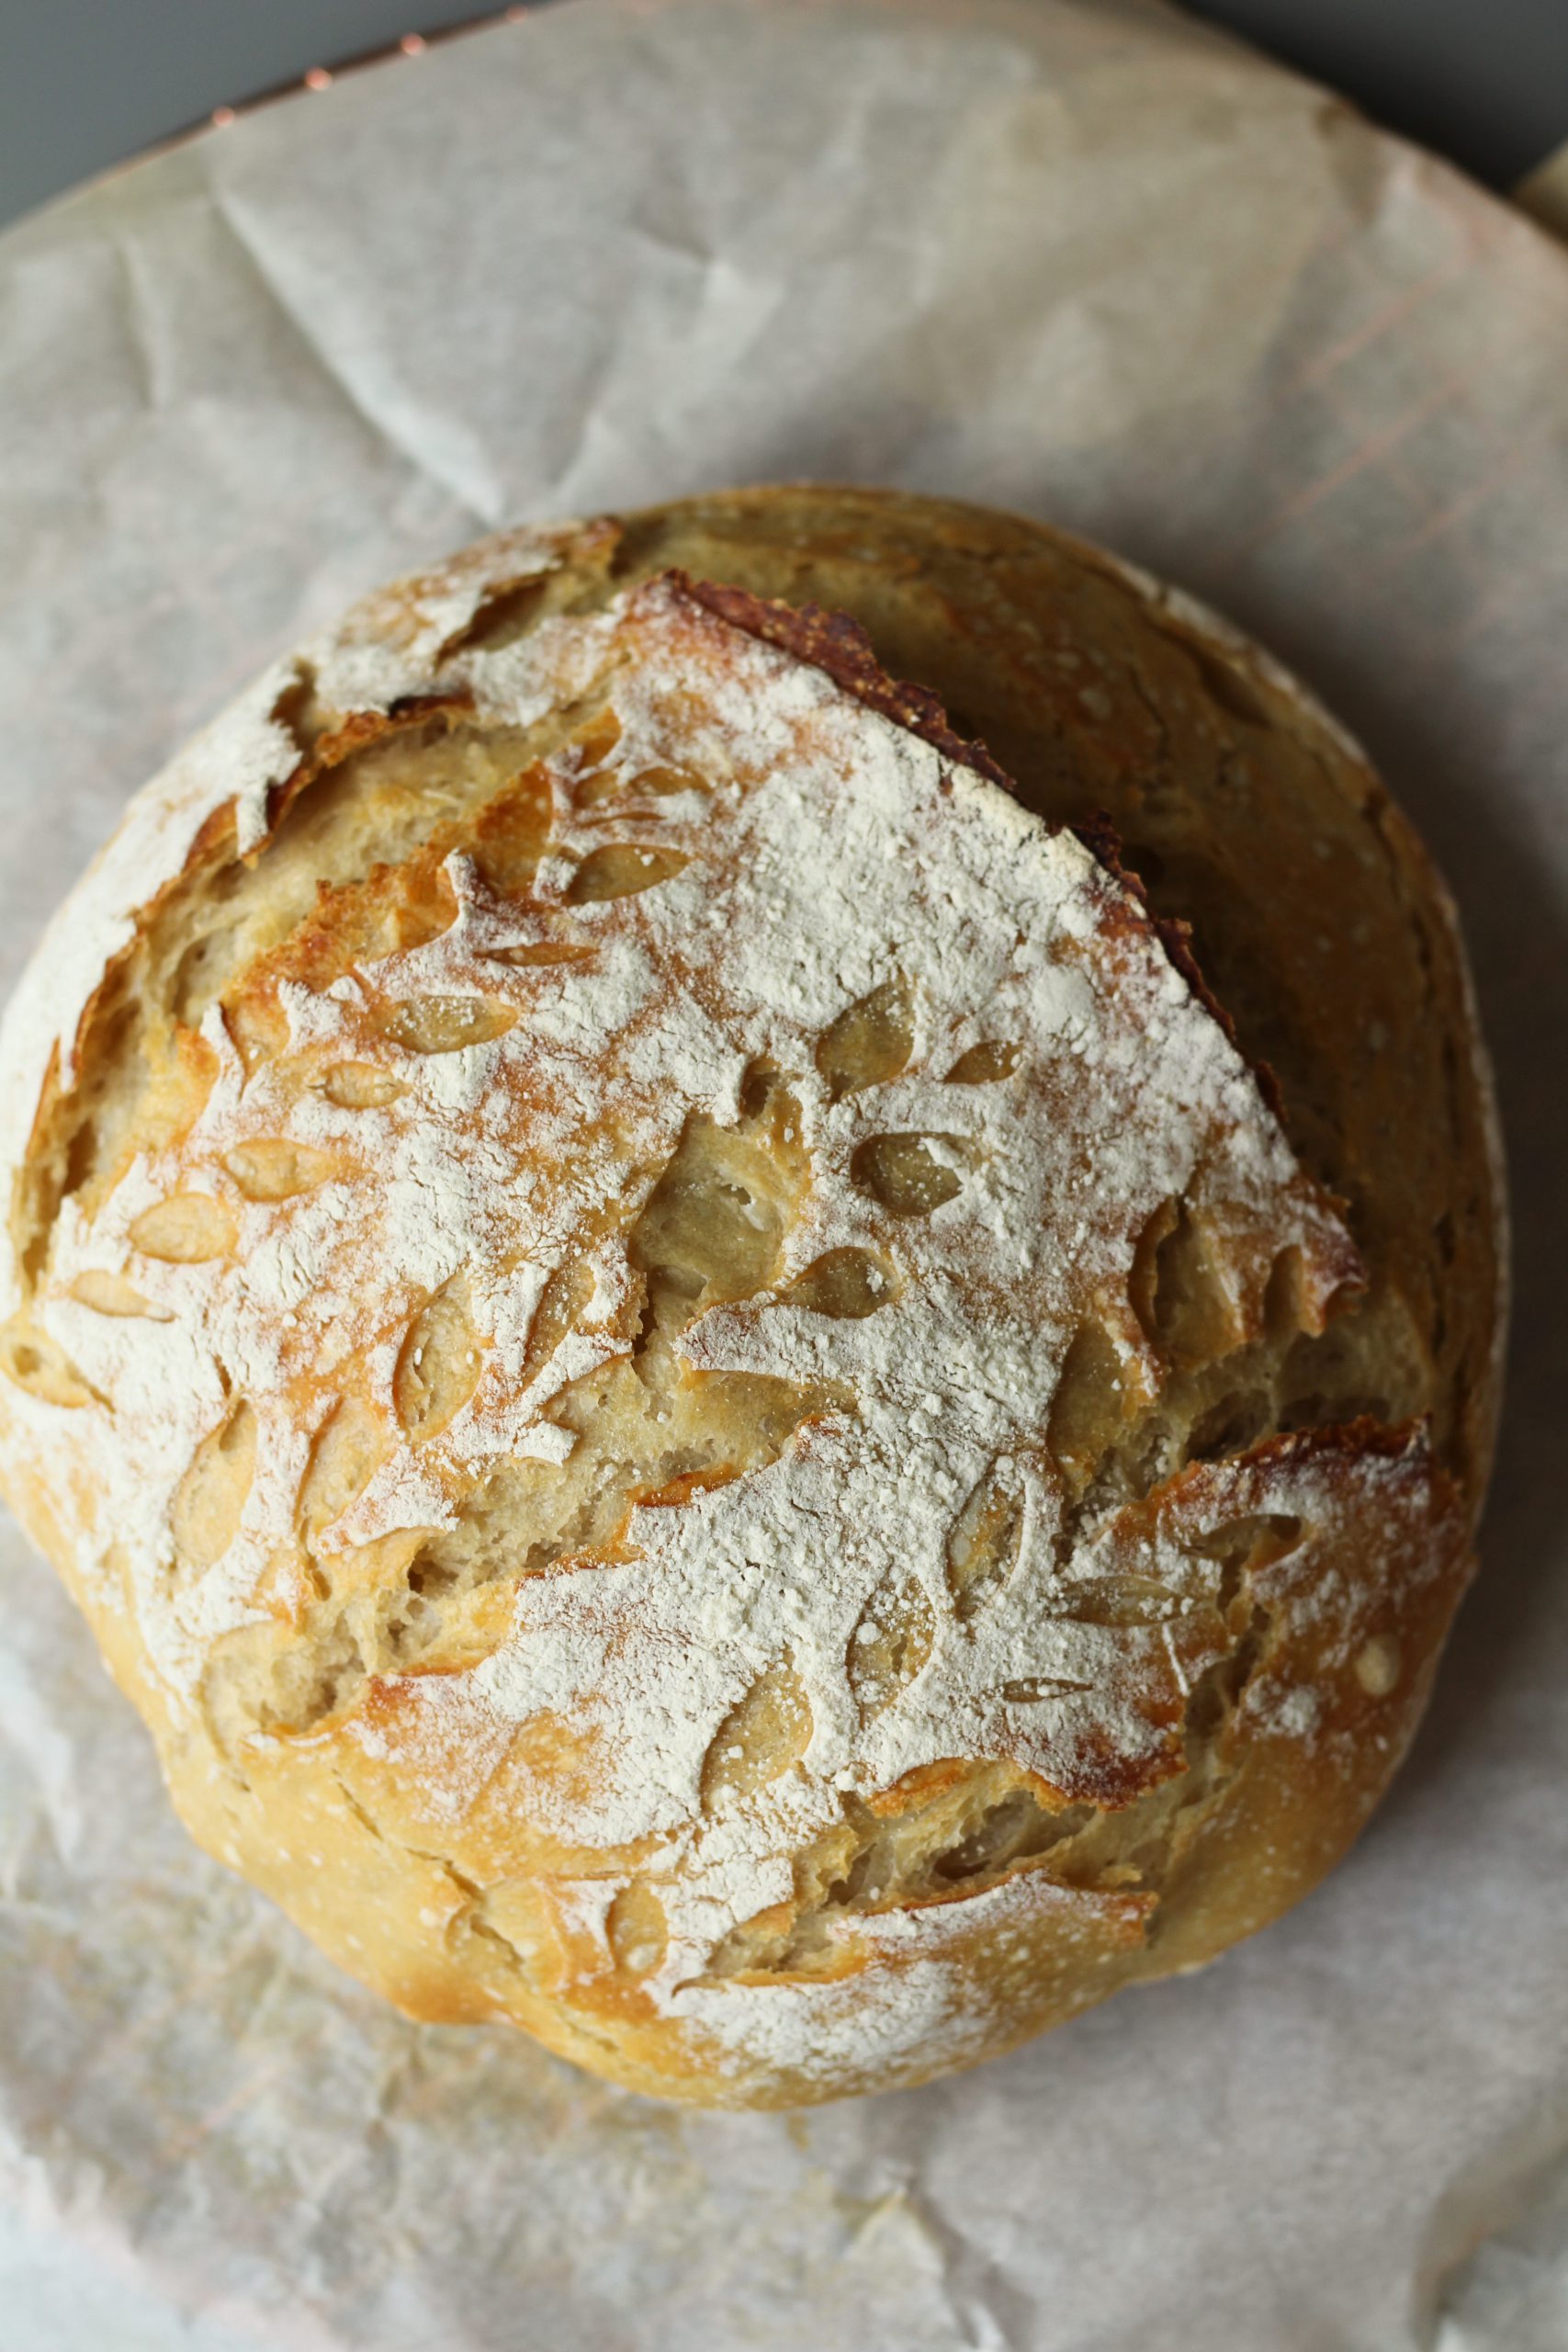
After the final rise, score the bread on top with a lame or blade. If you get a proving basket sometimes they come with a lame. I have tried multiple tools but so far I like this one the best. If you don’t have a lame a super sharp knife will work.
The lame I use is from Amazon.
Or you can also buy this lame with proving basket from Amazon.
This recipe is written as a starting point, but you can add fresh herbs, cheese or nuts. I recommend that if adding ingredients you don’t add more then 20%. For example, in this recipe, since we use 500 grams of flour you can add up to 100 grams of extra ingredients without adjusting the baking times. If you add in a cheese, use a semi hard cheese such as old Gouda or cheddar. Make sure you shred it small before adding it into the flour mixture.


Overnight Sourdough Bread
Equipment
- 1 Dutch oven pan
Ingredients
- 3 Cups Unbleached all purpose flour roughly 500 grams
- 1 1/2 Teaspoon Sea salt I use Le Guerandais Gros salt
- 1 Cup Purified water or filtered water roughly 290 grams
- 2/3 Cup Active bubbly starter, stirred down 150 gram
Instructions
Night before
- Mix salt and flour in a big mixing bowl
- Add the starter and gently mix in with spatula.
- Stir in the water and mix with hand until the dough is well combined. Around a minute.
- Cover the dough with cling wrap and let it rest for 30 minutes in a draft free and warm place.
- After 30 minutes gently stretch each corner out and fold the dough onto the opposite corner. The dough is sticky so it helps to have a little bowl of water next to you that you can wet your hands in throughout the folding process. After each stretch, fold and rotate the bowl to continue going around. Do this for 1 minute. See instruction video for additional explanation.
- Cover and let the dough rest overnight on the counter, 8-12 hours. When it is doubled in size you are ready for the next step.
Baking
- Preheat your oven ,with the Dutch oven and lid inside it, to 475 Farhenheit.
- Dust your counter with a little flour and carefully scape the dough out onto it. You want to keep all the air bubbles in the dough. Shape the dough gently into a ball. See instruction video.
- Place the dough into your proving basket dusted with flour and cover. Let it rise for 30 minutes. Don’t overprove. It is best to set a timer for this one. If you don’t have a proving basket, place the dough on parchment paper and cover with cling wrap.
- Carefully turn the dough onto a large piece of parchment paper. Both the dough and parchment paper will need to fit into the Dutch oven so keep that in mind when cutting the paper. Now it is time to get creative with a sharp knife or a lame to score the dough. See video for example.
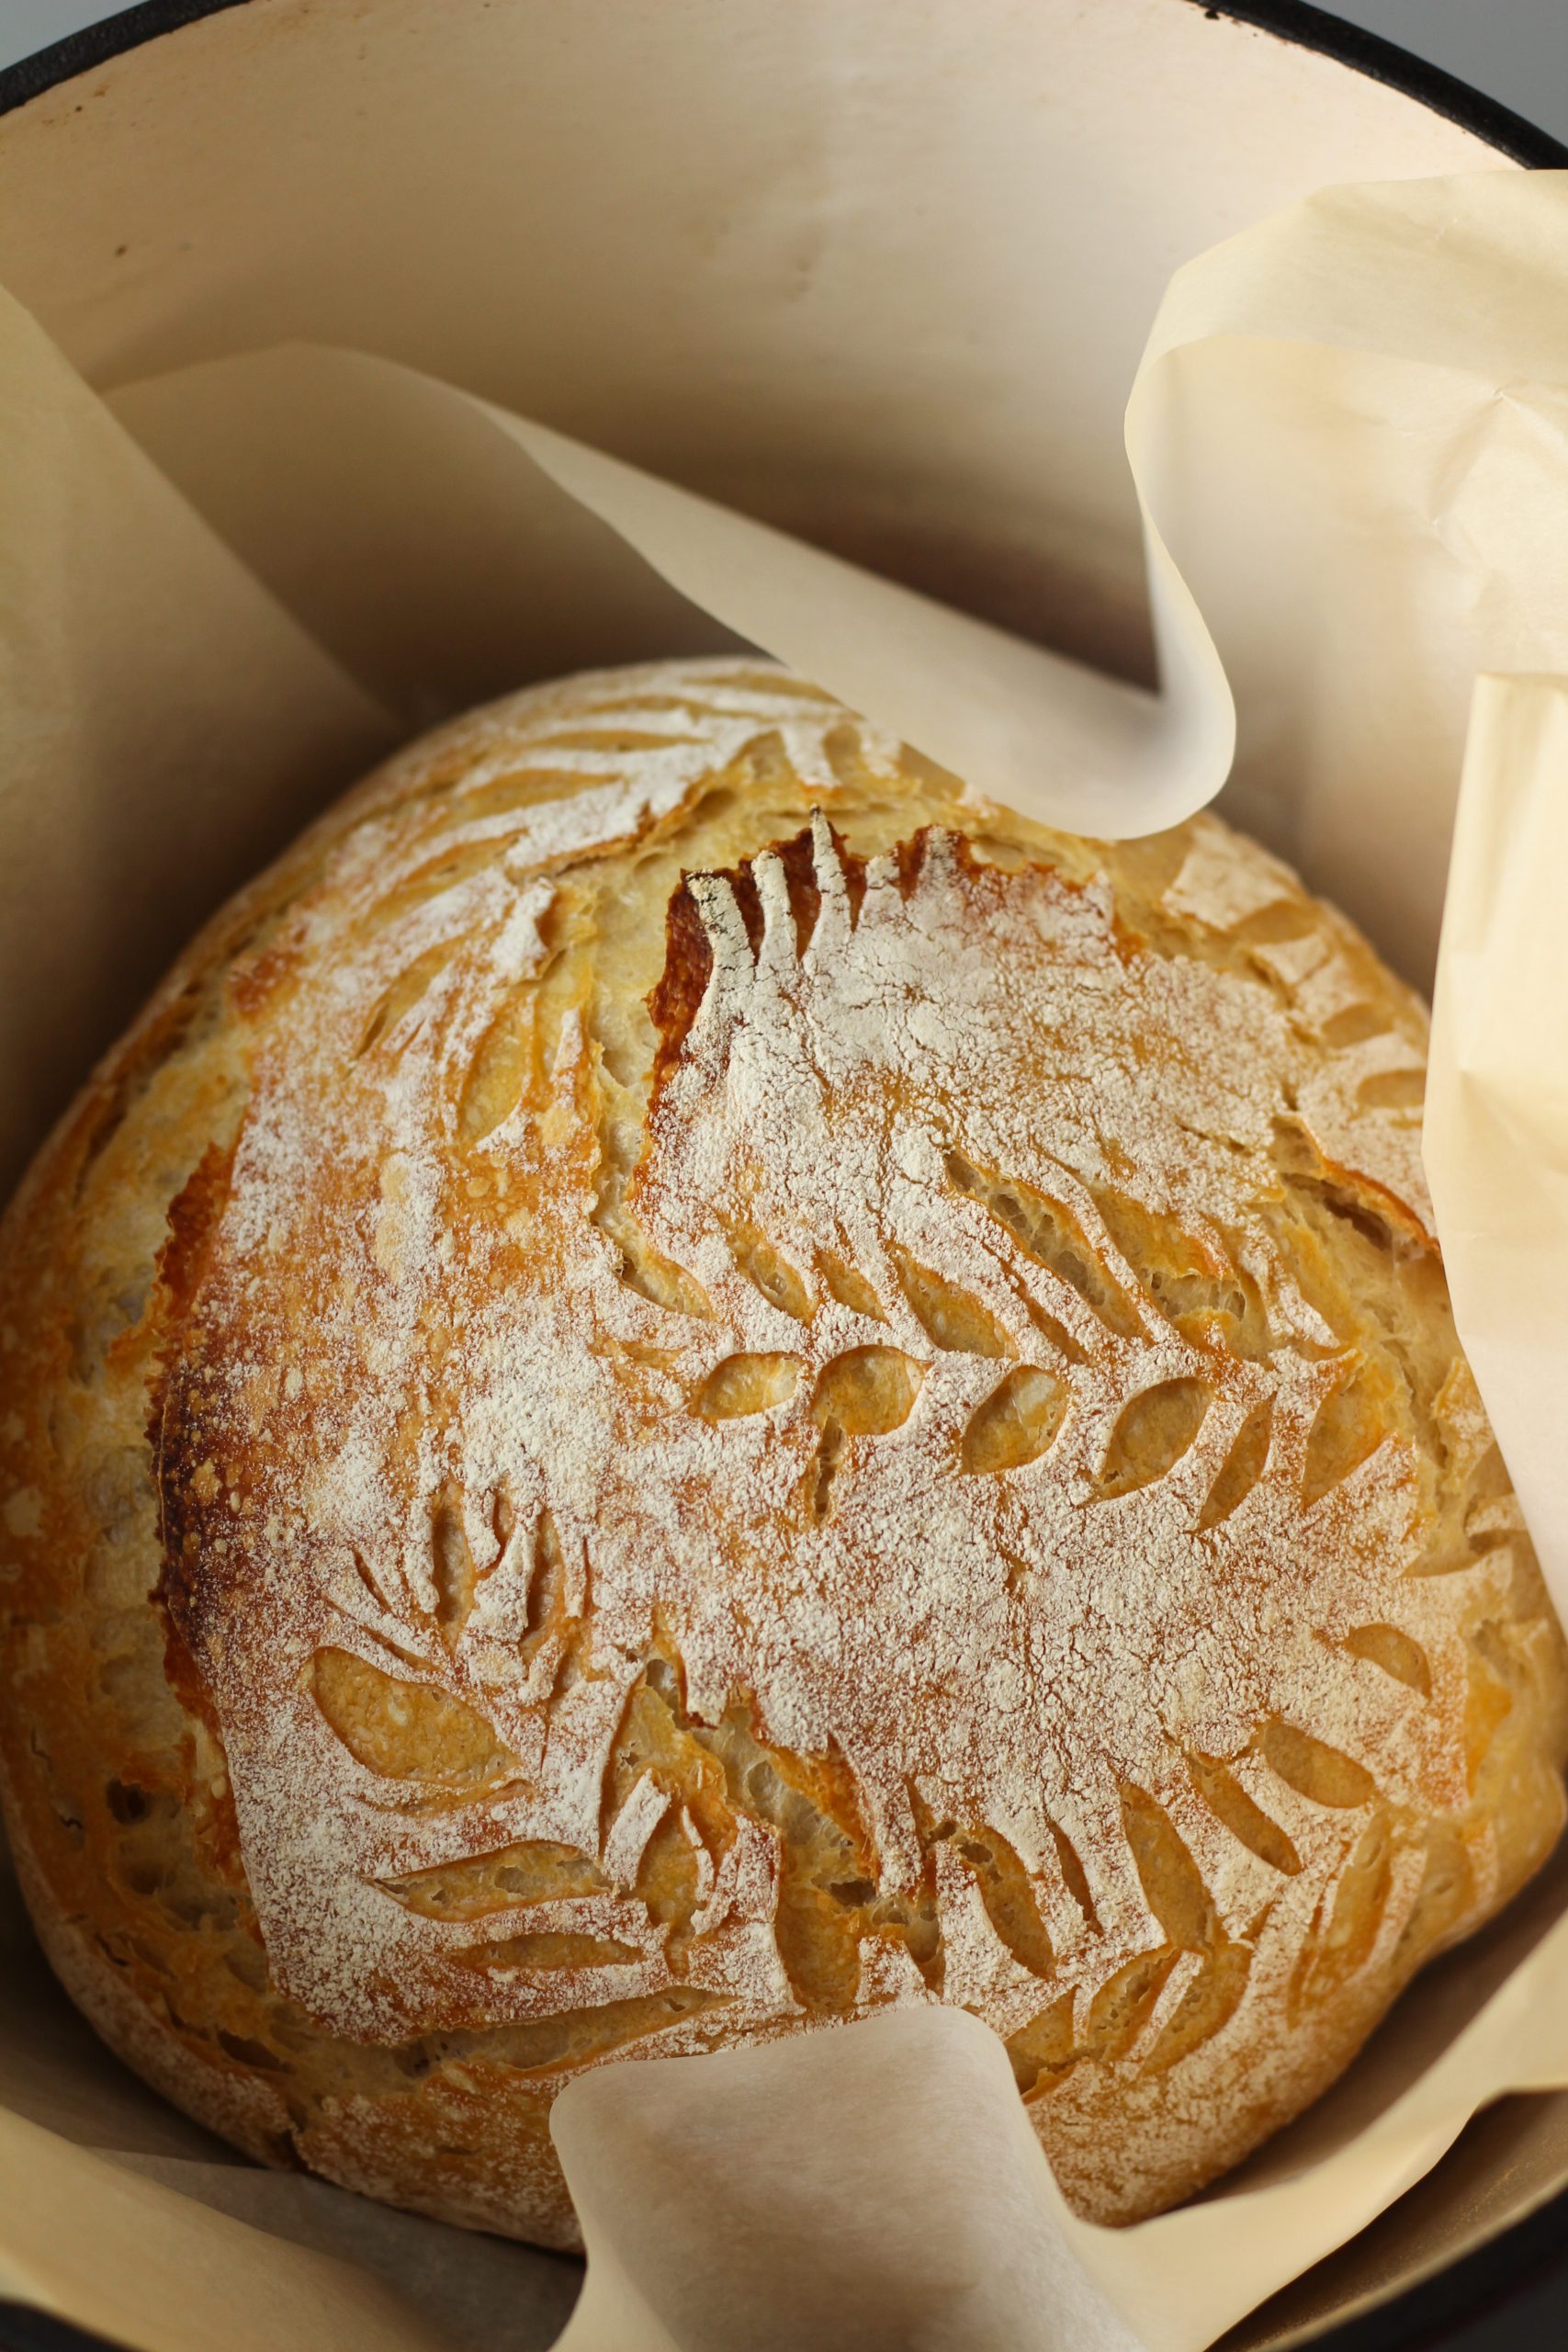
- Remove the Dutch oven from the warm oven. Remove the lid and carefully place the parchment paper with the bread into the pan. Replace the lid back and place in the oven.
- Reduce the oven to 420 Farhenheit and bake for 20 minutes.
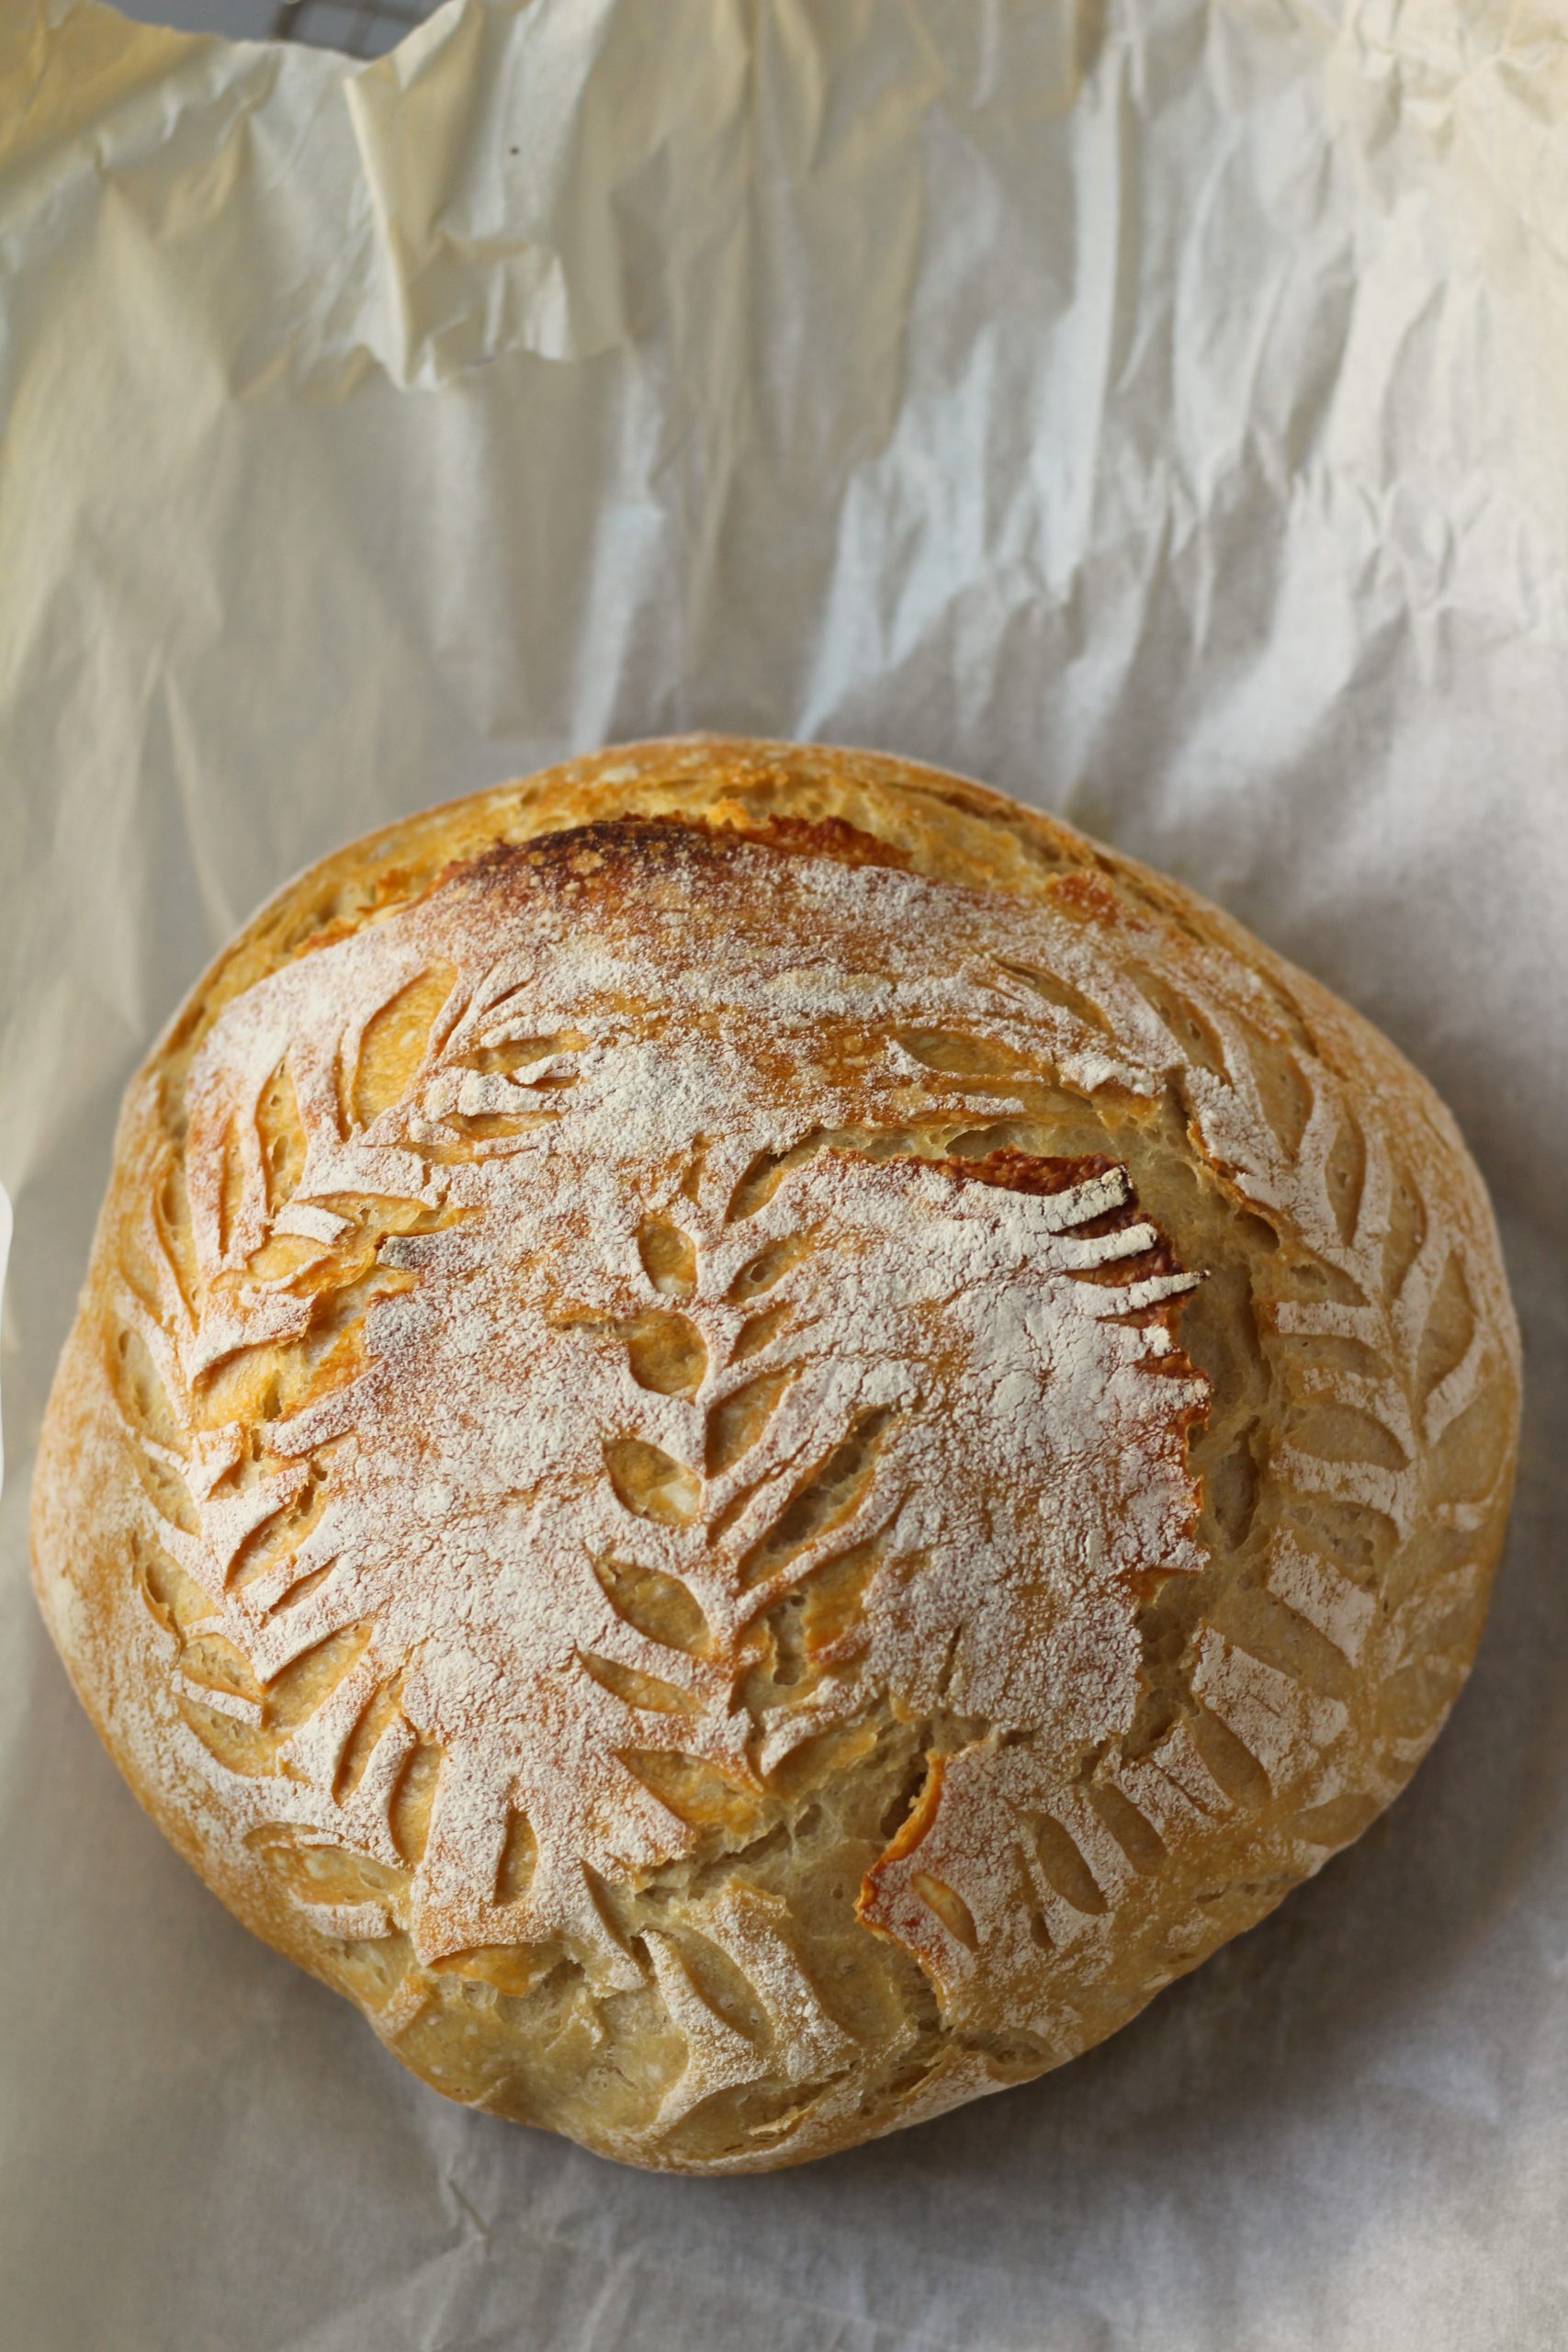
- After 20 minutes remove the lid, set oven to 425 Farhenheit and bake for another 20-25 minutes. Until it is golden brown and the bread sounds hollow when softly knocking on the bottom.
- Once done remove the bread from the dutch oven and let cool on a cooling rack.